I’ve carrying around this old pouch for about 5 years now… filled with a variety of objects. Mostly, it’s filled with a bunch of bobby pins, a couple hair ties, chap stick, nail trimmers, bandaids, Neosporin, and a bunch of loose floating pills. So, when my mom bought Altoid tins (remember that Instagram picture from yesterday?) before a long travel trip, I jumped on the chance to create some upcycled Altoid tin projects! (As for the actual mints, I threw the three flavors in three different ziploc bags and my brother, sister, and I each drew a picture on one bag. Cute!)

How to Scrapbook an Altoid tin:
1. Empty tin! Go ahead and rinse it out too, if you’re picky like that. :p
2. Choose your scrapbook paper, and place the Altoid lid on the back side
3. Trace

4. Cut

5. Modpodge the top of the tin, and put your paper on! It’ll be our light glue for now. :)
6. This next step is optional – I sanded down the sides of the paper. I wanted the paper to sit snug, and I liked the exposed parts it created. If you don’t like stripping the paint, just trim the paper. Honestly, I’d have liked if I sanded the entire lid side a little more!

7. Repeat steps 2-6 with the bottom

8. After the paper and glue have dried (and don’t skip this step! You want to give it the change to do so fully) add another layer of Modpoge as sealant. This will prevent the paper from getting ripped off by the edges. On the other hand, you can see the streaks mine left on the side of the exposed tin, so watch out for that if it is going to bother you. I’m actually a fan of imperfections. Personality!

Once it was all dry, I gathered up some of my collection to put in the new tin: bandaids, fewer bobby pins, just one hair tie, chapstick, nail trimmers, and Neosporin.

Finally, a new container where it isn’t awkward to try and pull out my chapstick from under my nail trimmers! On the other hand, I haven’t come up with a solution on how to store my pills inside here, but not have them grossly clanging around in the tin this time.
")
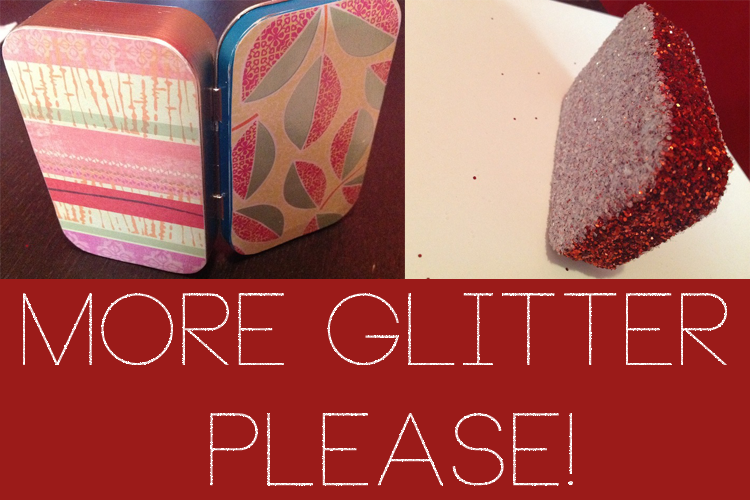
Using a similar technique, I also made a tin that is completely glittered! My favorite color is red, and I love how it turned out. I added translucent glitter on the top and bottom to give it a frosted look, which does add dimension, but I don’t like it as much as the pure red before.

Here’s it opened, just to show the can is still completely functional! Tomorrow I’ll write a how-to for the first tin I made like this: a blue one by my little sister. I don’t carry this one around in my backpack since it’d get glitter everywhere… (I didn’t seal it) but I’m working on something fancy to do with it!
UPDATE: Post here! :)

I could always make a candle of it… glitter goes well with flames, right?

Also, after making my tins, I stumbled upon this link. Um, talk about a fancy altoid tin. I like mine, but I’ll admit this looks a tad bit more professional.

Leave a Reply